Solutions
Device management
Remotely manage, and protect laptops and mobile devices.
Orchestration
Automate tasks across devices, from app installs to scripts.
Software management
Inventory, patch, and manage installed software.
Infrastructure as code
See every change, undo any error, repeat every success.
Extend Fleet
Integrate your favorite tools with Fleet.
Customers
Pricing
More
Device management
Remotely manage, and protect laptops and mobile devices.
Orchestration
Automate tasks across devices, from app installs to scripts.
Software management
Inventory, patch, and manage installed software.
Infrastructure as code
See every change, undo any error, repeat every success.
Extend Fleet
Integrate your favorite tools with Fleet.
Connect end users to Wi-Fi or VPN with a certificate (DigiCert, NDES, Hydrant, Smallstep, or custom SCEP)
{{articleSubtitle}}
Victor Lyuboslavsky
Connect end users to Wi-Fi or VPN with a certificate (DigiCert, NDES, Hydrant, Smallstep, or custom SCEP)
{{articleSubtitle}}
Victor Lyuboslavsky
Connect end users to Wi-Fi or VPN with a certificate (DigiCert, NDES, Hydrant, Smallstep, or custom SCEP)
Available in Fleet Premium
Fleet can help your end users connect to Wi-Fi or VPN by deploying certificates from your certificate authority (CA). Fleet currently supports DigiCert, Microsoft NDES,Smallstep, Hydrant, and a custom SCEP or EST server.
Fleet will automatically renew certificates on Apple (macOS, iOS, iPadOS) hosts before expiration. Learn more in the Renewal section.
DigiCert
The following steps show how to connect end users to Wi-Fi or VPN with DigiCert certificates.
Step 1: Create a service user in DigiCert
- Log in to DigiCert One.
- Create a new service user, under the "DigiCert ONE Manager access" dropdown, select "Trust Lifecycle."
- On the next page, assign the User and certificate manager and Certificate profile manager roles.

For further information, see DigiCert's instructions for creating a service user.
Step 2: Create certificate profile in DigiCert
- In DigiCert Trust Lifcycle Manager, select Policies > Certificate profiles from the main menu. Then select Create profile from template and select Generic Device Certificate from the list.
- Add a friendly Profile name (e.g., "Fleet - Wi-Fi authentication").
- Select your Business unit and Issuing CA.
- Select REST API from Enrollment method. Then select 3rd party app from the Authentication method dropdown and select Next.
- Configure the certificate expiration. At most organizations, this is set to 90 days.
- In the Flow options section, make sure that Allow duplicate certificates is checked.
- In the Subject DN and SAN fields section, add Common name. Other name (UPN) is optional.
- For Common name, select REST request from Source for the field's value dropdown and check Required.
- If you use Other name (UPN), select REST Request and check both Required and Multiple.
- Organizations usually use the device's serial number or the user's email. Fleet variables (covered in the next step) can be used to replace these variables with the actual values before the certificate is delivered to a device.
- Click Next and leave the default options.
Step 3: Connect Fleet to DigiCert
- In Fleet, head to Settings > Integrations > Certificates.
- Select Add CA and then choose DigiCert in the dropdown.
- Add a Name for your certificate authority. Best practice is all caps snake case (for example, "WIFI_AUTHENTICATION"). This name is used later as a variable name in a configuration profile.
- If you're using DigiCert One's cloud offering, keep the default URL. If you're using a self-hosted (on-prem) DigiCert One, update the URL to match the one you use to log in to your DigiCert One.
- In API token, paste your DigiCert server user's API token (from step 1).
- In Profile GUID, paste your DigiCert One certificate profile GUID (from step 2). To your GUID, open the profile in DigiCert and copy GUID from the Certificate profiles page.
- In CN, UPN, and Certificate seat ID, enter fixed values or select from Fleet's host variables. Most organizations use the host's serial number or end user's email to deliver a certificate that's unique to the host.
- Select Add CA. Your DigiCert certificate authority (CA) should appear in your list of CAs in Fleet.
Step 4: Add PKCS12 configuration profile to Fleet
- Create a configuration profile with a PKCS12 payload.
- For
Password, use$FLEET_VAR_DIGICERT_PASSWORD_{CA_NAME}. - For
Data, use$FLEET_VAR_DIGICERT_DATA_{CA_NAME}.
Replace the
{CA_NAME}with the name you created in step 3. For example, if the name of the CA is "WIFI_AUTHENTICATION", the variables will look like$FLEET_VAR_DIGICERT_PASSWORD_WIFI_AUTHENTICATIONand$FLEET_VAR_DIGICERT_DATA_WIFI_AUTHENTICATION.In Fleet, head to Controls > OS settings > Custom settings and add the configuration profile to deploy certificates to your hosts.
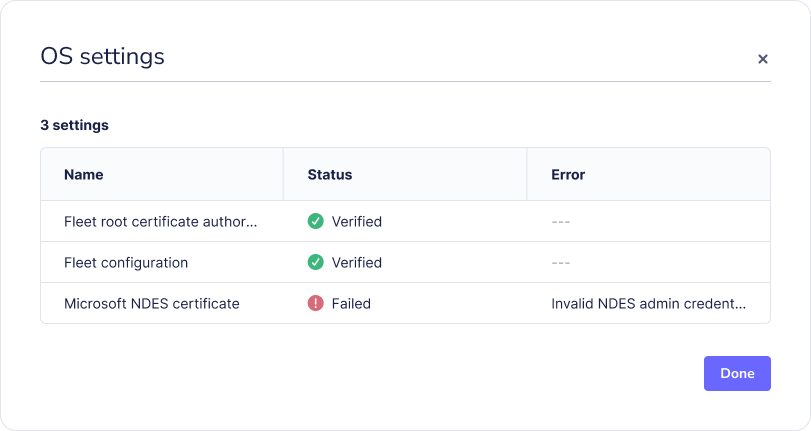
When Fleet delivers the profile to your hosts, Fleet will replace the variables. If something goes wrong, errors will appear on each host's Host details > OS settings.
Additional DigiCert details:
- Each DigiCert device type seat (license) can have multiple certificates only if they have the same CN and seat ID. If a new certificate has a different CN, a new DigiCert license is required.
- If the value for any variable used in step 3 above changes, Fleet will resend the profile. This means that if you use a variable like
$FLEET_VAR_HOST_END_USER_IDP_USERNAMEfor CN or seat ID, and the variable's value changes, Fleet will get a new certificate and create a new seat in DigiCert. This will add a new DigiCert license. If you want to revoke a license in DigiCert, head to Trust Lifcycle Manager > Account > Seats and remove the seat. - DigiCert seats aren't automatically revoked when hosts are deleted in Fleet. To revoke a license, ask the team that owns DigiCert to follow the instructions above.
Example configuration profile
<?xml version="1.0" encoding="UTF-8"?>
<!DOCTYPE plist PUBLIC "-//Apple//DTD PLIST 1.0//EN" "http://www.apple.com/DTDs/PropertyList-1.0.dtd">
<plist version="1.0">
    <dict>
        <key>PayloadContent</key>
        <array>
            <dict>
                <key>Password</key>
                <string>$FLEET_VAR_DIGICERT_PASSWORD_{CA_NAME}</string>
                <key>PayloadContent</key>
                <data>$FLEET_VAR_DIGICERT_DATA_{CA_NAME}</data>
                <key>PayloadDisplayName</key>
                <string>CertificatePKCS12</string>
                <key>PayloadIdentifier</key>
                <string>com.fleetdm.pkcs12</string>
                <key>PayloadType</key>
                <string>com.apple.security.pkcs12</string>
                <key>PayloadUUID</key>
                <string>ee86cfcb-2409-42c2-9394-1f8113412e04</string>
                <key>PayloadVersion</key>
                <integer>1</integer>
            </dict>
        </array>
        <key>PayloadDisplayName</key>
        <string>DigiCert profile</string>
        <key>PayloadIdentifier</key>
        <string>TopPayloadIdentifier</string>
        <key>PayloadType</key>
        <string>Configuration</string>
        <key>PayloadUUID</key>
        <string>TopPayloadUUID</string>
        <key>PayloadVersion</key>
        <integer>1</integer>
    </dict>
</plist>
Microsoft NDES
The following steps show how to connect end users to Wi-Fi or VPN with Microsoft NDES certificates.
Step 1: Connect Fleet to NDES
- In Fleet, head to **Settings > Integrations > Certificates.
- Select the Add CA button and select Microsoft NDES in the dropdown.
- Enter your SCEP URL, Admin URL, and Username and Password.
- Select Add CA. Your NDES certificate authority (CA) should appear in the list in Fleet.
The example paths end with /certsrv/mscep/mscep.dll and /certsrv/mscep_admin/ respectively. These path suffixes are the default paths for NDES on Windows Server 2022 and should only be changed if you have customized the paths on your server.
When saving the configuration, Fleet will attempt to connect to the SCEP server to verify the connection, including retrieving a one-time challenge password. This validation also occurs when adding a new SCEP configuration or updating an existing one via API and GitOps, including dry runs. Please ensure the NDES password cache size is large enough to accommodate this validation.
Step 2: Add SCEP configuration profile to Fleet
Create a configuration profile with the SCEP payload. In the profile, for
Challenge, use$FLEET_VAR_NDES_SCEP_CHALLENGE. ForURL, use$FLEET_VAR_NDES_SCEP_PROXY_URL, and make sure to add$FLEET_VAR_SCEP_RENEWAL_IDtoOU.If your Wi-Fi or VPN requires certificates that are unique to each host, update the
Subject. You can use$FLEET_VAR_HOST_END_USER_EMAIL_IDPif your hosts automatically enrolled (via ADE) to Fleet with end user authentication enabled. You can also use any of the Apple's built-in variables.In Fleet, head to Controls > OS settings > Custom settings and add the configuration profile to deploy certificates to your hosts.
When the profile is delivered to your hosts, Fleet will replace the variables. If something fails, errors will appear on each host's Host details > OS settings.
Example configuration profile
<?xml version="1.0" encoding="UTF-8"?>
<!DOCTYPE plist PUBLIC "-//Apple//DTD PLIST 1.0//EN" "http://www.apple.com/DTDs/PropertyList-1.0.dtd">
<plist version="1.0">
<dict>
    <key>PayloadContent</key>
    <array>
       <dict>
          <key>PayloadContent</key>
          <dict>
             <key>Challenge</key>
             <string>$FLEET_VAR_NDES_SCEP_CHALLENGE</string>
             <key>Key Type</key>
             <string>RSA</string>
             <key>Key Usage</key>
             <integer>5</integer>
             <key>Keysize</key>
             <integer>2048</integer>
             <key>Subject</key>
                    <array>
                        <array>
                          <array>
                            <string>CN</string>
                            <string>%SerialNumber% WIFI</string>
                          </array>
                        </array>
                        <array>
                          <array>
                            <string>OU</string>
                            <string>$FLEET_VAR_SCEP_RENEWAL_ID</string>
                          </array>
                        </array>
                    </array>
             <key>URL</key>
             <string>$FLEET_VAR_NDES_SCEP_PROXY_URL</string>
          </dict>
          <key>PayloadDisplayName</key>
          <string>WIFI SCEP</string>
          <key>PayloadIdentifier</key>
          <string>com.apple.security.scep.9DCC35A5-72F9-42B7-9A98-7AD9A9CCA3AC</string>
          <key>PayloadType</key>
          <string>com.apple.security.scep</string>
          <key>PayloadUUID</key>
          <string>9DCC35A5-72F9-42B7-9A98-7AD9A9CCA3AC</string>
          <key>PayloadVersion</key>
          <integer>1</integer>
       </dict>
    </array>
    <key>PayloadDisplayName</key>
    <string>SCEP proxy cert</string>
    <key>PayloadIdentifier</key>
    <string>Fleet.WiFi</string>
    <key>PayloadType</key>
    <string>Configuration</string>
    <key>PayloadUUID</key>
    <string>4CD1BD65-1D2C-4E9E-9E18-9BCD400CDEDC</string>
    <key>PayloadVersion</key>
    <integer>1</integer>
</dict>
</plist>
Smallstep
The following steps show how to connect end users to Wi-Fi or VPN with Smallstep certificates.
Step 1: Configure Smallstep with Fleet information
We're currently working with Smallstep to develop a specific Smallstep-Fleet connector. In the meantime, Smallstep can be configured to work with Fleet by using the Smallstep-Jamf connector.
In Smallstep, go to Settings > Device Management.
Under Available Providers, find Jamf and click Connect.
In the Smallstepform, enter your Fleet server URL (the API Client ID and API Client Secret fields are not required), then click Connect MDM.
After connecting, note the following details from Smallstep (these values are required in the next step):
- SCEP URL
- WebhookURL (SCEPChallenge)
- Challenge Basic Authentication Username
- Challenge Basic Authentication Password
Step 2: Configure Fleet with Smallstep information
In Fleet, go to Settings > Integrations > Certificates and click Add CA.
In the modal, select Smallstep from the dropdown and enter a name for your certificate authority (CA). Best practice is all caps snake case (for example, "WIFI_AUTHENTICATION"). This name is used later as a variable name in a configuration profile.
For the Challenge URL, Username, and Password, enter the values noted in step 1. For the SCEP URL, you'll need to modify the URL provided by Smallstep to use the public proxy route instead. For example,
https://agents.SMALLSTEP_TEAM_NAME.ca.smallstep.com/scep/INTEGRATION_IDbecomeshttps://<SMALLSTEP_TEAM_NAME>.scep.smallstep.com/p/agents/<INTEGRATION_ID>
Step 3: Add SCEP configuration profile to Fleet
- Create a configuration profile with the SCEP payload.
- For
Challenge, use$FLEET_VAR_SMALLSTEP_SCEP_CHALLENGE_{CA_NAME}. - For
URL, use$FLEET_VAR_SMALLSTEP_SCEP_PROXY_URL_{CA_NAME}, and make sure to add$FLEET_VAR_SCEP_RENEWAL_IDtoOU.
Replace the
{CA_NAME}with the name you created in step 2. For example, if the name of the CA is "WIFI_AUTHENTICATION", the variables will look like this:$FLEET_VAR_SMALLSTEP_SCEP_CHALLENGE_WIFI_AUTHENTICATIONandFLEET_VAR_SMALLSTEP_SCEP_PROXY_URL_WIFI_AUTHENTICATION.If your Wi-Fi or VPN requires certificates that are unique to each host, update the
Subject. You can use$FLEET_VAR_HOST_END_USER_EMAIL_IDPif your hosts automatically enrolled (via ADE) to Fleet with end user authentication enabled. You can also use any of the Apple's built-in variables.In Fleet, head to Controls > OS settings > Custom settings and add the configuration profile to deploy certificates to your hosts.
When the profile is delivered to your hosts, Fleet will replace the variables. If something goes wrong, errors will appear on each host's Host details > OS settings.
Example configuration profile
<?xml version="1.0" encoding="UTF-8"?>
<!DOCTYPE plist PUBLIC "-//Apple//DTD PLIST 1.0//EN" "http://www.apple.com/DTDs/PropertyList-1.0.dtd">
<plist version="1.0">
<dict>
    <key>PayloadContent</key>
    <array>
       <dict>
          <key>PayloadContent</key>
          <dict>
             <key>Challenge</key>
             <string>$FLEET_VAR_SMALLSTEP_SCEP_CHALLENGE_{CA_NAME}</string>
             <key>Key Type</key>
             <string>RSA</string>
             <key>Key Usage</key>
             <integer>5</integer>
             <key>Keysize</key>
             <integer>2048</integer>
             <key>Subject</key>
                    <array>
                        <array>
                          <array>
                            <string>CN</string>
                            <string>%SerialNumber% WIFI</string>
                          </array>
                        </array>
                        <array>
                          <array>
                            <string>OU</string>
                            <string>$FLEET_VAR_SCEP_RENEWAL_ID</string>
                          </array>
                        </array>
                    </array>
             <key>URL</key>
             <string>$FLEET_VAR_SMALLSTEP_SCEP_PROXY_URL_{CA_NAME}</string>
          </dict>
          <key>PayloadDisplayName</key>
          <string>WIFI SCEP</string>
          <key>PayloadIdentifier</key>
          <string>com.apple.security.scep.9DCC35A5-72F9-42B7-9A98-7AD9A9CCA3AC</string>
          <key>PayloadType</key>
          <string>com.apple.security.scep</string>
          <key>PayloadUUID</key>
          <string>9DCC35A5-72F9-42B7-9A98-7AD9A9CCA3AC</string>
          <key>PayloadVersion</key>
          <integer>1</integer>
       </dict>
    </array>
    <key>PayloadDisplayName</key>
    <string>SCEP proxy cert</string>
    <key>PayloadIdentifier</key>
    <string>Fleet.WiFi</string>
    <key>PayloadType</key>
    <string>Configuration</string>
    <key>PayloadUUID</key>
    <string>4CD1BD65-1D2C-4E9E-9E18-9BCD400CDEDC</string>
    <key>PayloadVersion</key>
    <integer>1</integer>
</dict>
</plist>
Hydrant
The following steps show how to connect end users to Wi-Fi or VPN with Hydrant.
The flow for Hydrant differs from the other certificate authorities (CA's). While other CAs in Fleet use a configuration profile to request a certificate, Hydrant uses:
- A custom script that makes a request to Fleet's
POST /request_certificateAPI endpoint. - A custom policy that triggers the script on hosts that don't have a certificate.
Step 1: Create a Hydrant user and obtain its API credentials
- Log in to your company's ACM platform.
- Invite a new user that will be used for certificate generation and ensure it has the required permissions to request certificates.
- Log out and log back in as the new user.
- Get the API keys for the newly created user, make a note of the Client ID and Client Secret, you will need that to connect Fleet with Hydrant in the next step.
Step 2: Connect Fleet to Hydrant
- In Fleet, head to Settings > Integrations > Certificates.
- Select Add CA and then choose Hydrant EST in the dropdown.
- Add a Name for your certificate authority. The best practice is to create a name based on your use case in all caps snake case (ex. "WIFI_AUTHENTICATION").
- Add your Hydrant EST URL.
- Add the Hydrant ID and Key as the Client ID and Client secret in Fleet respectfully.
- Click Add CA. Your Hydrant certificate authority (CA) should appear in the list in Fleet.
Step 3: Create a custom script
To deploy certificates automatically to Linux hosts at enrollment, create a script that writes the certificate to the filesystem. Use a policy to trigger this script on any host that doesn’t have a certificate.
This custom script will create a certificate signing request (CSR) and make a request to Fleet's "Request certificate" API endpoint.
- Create an API-only user with the global maintainer role. Learn how to create an API-only user in the API-only user guide.
- In Fleet, head to Controls > Variables and create a Fleet variable called REQUEST_CERTIFICATE_API_TOKEN. Add the API-only user's API token as the value. You'll use this variable in your script.
- Make a request to Fleet's
GET /certificate_authoritiesAPI endpoint to get theidfor your Hydrant CA. You'll use thisidin your script. - In Fleet, head to Controls > Scripts, and add a script like the one below, plugging in your own filesystem locations, Fleet server URL and IdP information. For this script to work, the host it's run on has to have openssl, sed, curl and jq installed.
Example script:
#!/bin/bash
set -e

# Load the end user information, IdP token and IdP client ID.
. /opt/company/userinfo

URL="<IdP-introspection-URL>"

# Generate the password-protected private key
openssl genpkey -algorithm RSA -out /opt/company/CustomerUserNetworkAccess.key -pkeyopt rsa_keygen_bits:2048 -aes256 -pass pass:${PASSWORD}

# Generate CSR signed with that private key. The CN can be changed and DNS attribute omitted if your Hydrant configuration allows it.
openssl req -new -sha256 -key /opt/company/CustomerUserNetworkAccess.key -out CustomerUserNetworkAccess.csr -subj /CN=CustomerUserNetworkAccess:${USERNAME} -addext "subjectAltName=DNS:example.com, email:$USERNAME, otherName:msUPN;UTF8:$USERNAME" -passin pass:${PASSWORD}

# Escape CSR for request
CSR=$(sed 's/$/\\n/' CustomerUserNetworkAccess.csr | tr -d '\n')
REQUEST='{ "csr": "'"${CSR}"'", "idp_oauth_url":"'"${URL}"'", "idp_token": "'"${TOKEN}"'", "idp_client_id": "'"${CLIENT_ID}"'" }'

curl 'https://<Fleet-server-URL>/api/latest/fleet/certificate_authorities/<Hydrant-CA-ID>/request_certificate' \
  -X 'POST' \
  -H 'accept: application/json, text/plain, */*' \
  -H 'authorization: Bearer '"$FLEET_SECRET_REQUEST_CERTIFICATE_API_TOKEN" \
  -H 'content-type: application/json' \
  --data-raw "${REQUEST}" -o response.json

jq -r .certificate response.json > /opt/company/certificate.pem
This script assumes that your company installs a custom Company Portal app or something similar at /opt/company, gathers the user's IdP session information, uses username and a password to protect the private key from /opt/company/userinfo, and installs that the certificate in /opt/company. You will want to modify it to match your company's requirements.
For simplicity, the scripts use a userinfo file (below). However, the best practice is to load variables from the output of a command or even a separate network request:
PASSWORD="<Password-for-the-certificate-private-key>"
USERNAME="<End-user-email>"
TOKEN="<End-user-OAuth-IdP-token>"
CLIENT_ID="<OAuth-IdP-client-ID>"
Enforcing IdP validation using idp_oauth_url and idp_token is optional. If enforced, the CSR must include exactly 1 email which matches the IdP username and must include a UPN attribute which is either a prefix of the IdP username or the username itself (i.e. if the IdP username is "bob@example.com", the UPN may be "bob" or "bob@example.com")
Step 4: Create a custom policy
- In Fleet, head to Policies and select Add policy. Use the following query to detect the certificate's existence and if it expires in the next 30 days:
SELECT 1 FROM certificates WHERE path = '/opt/company/certificate.pem' AND not_valid_after > (CAST(strftime('%s', 'now') AS INTEGER) + 2592000);- Select Save and select only Linux as its target. Select Save again to create your policy.
- On the Policies page, select Manage automations > Scripts. Select your newly-created policy and then in the dropdown to the right, select your newly created certificate issuance script.
- Now, any host that doesn't have a certificate in
/opt/company/certificate.pemor has a certificate that expires in the next 30 days will fail the policy. When the policy fails, Fleet will run the script to deploy a new certificate!
Custom SCEP (Simple Certificate Enrollment Protocol)
The following steps show how to connect end users to Wi-Fi or VPN with a custom SCEP server.
Step 1: Connect Fleet to a custom SCEP server
- In Fleet, head to **Settings > Integrations > Certificates.
- Select the Add CA button and select Custom in the dropdown.
- Add a Name for your certificate authority. The best practice is to create a name based on your use case in all caps snake case (for example, "WIFI_AUTHENTICATION"). This name will be used later as a variable name in a configuration profile.
- Add your SCEP URL and Challenge.
- Select Add CA. Your custom SCEP certificate authority (CA) should appear in the list in Fleet.
Step 2: Add SCEP configuration profile to Fleet
Create a configuration profile with the SCEP payload. In the profile, for
Challenge, use$FLEET_VAR_CUSTOM_SCEP_CHALLENGE_{CA_NAME}. ForURL, use$FLEET_VAR_CUSTOM_SCEP_PROXY_URL_{CA_NAME}, and make sure to add$FLEET_VAR_SCEP_RENEWAL_IDtoOU.Replace the
{CA_NAME}with the name you created in step 3. For example, if the name of the CA is "WIFI_AUTHENTICATION", the variables will look like this:$FLEET_VAR_CUSTOM_SCEP_PASSWORD_WIFI_AUTHENTICATIONandFLEET_VAR_CUSTOM_SCEP_DIGICERT_DATA_WIFI_AUTHENTICATION.If your Wi-Fi or VPN requires certificates that are unique to each host, update the
Subject. You can use$FLEET_VAR_HOST_END_USER_EMAIL_IDPif your hosts automatically enrolled (via ADE) to Fleet with end user authentication enabled. You can also use any of Apple's built-in variables.In Fleet, head to Controls > OS settings > Custom settings and add the configuration profile to deploy certificates to your hosts.
When the profile is delivered to your hosts, Fleet will replace the variables. If something goes wrong, errors will appear on each host's Host details > OS settings.
Example configuration profiles
Apple configuration profile
<?xml version="1.0" encoding="UTF-8"?>
<!DOCTYPE plist PUBLIC "-//Apple//DTD PLIST 1.0//EN" "http://www.apple.com/DTDs/PropertyList-1.0.dtd">
<plist version="1.0">
<dict>
    <key>PayloadContent</key>
    <array>
       <dict>
          <key>PayloadContent</key>
          <dict>
             <key>Challenge</key>
             <string>$FLEET_VAR_CUSTOM_SCEP_CHALLENGE_{CA_NAME}</string>
             <key>Key Type</key>
             <string>RSA</string>
             <key>Key Usage</key>
             <integer>5</integer>
             <key>Keysize</key>
             <integer>2048</integer>
             <key>Subject</key>
                    <array>
                        <array>
                          <array>
                            <string>CN</string>
                            <string>%SerialNumber% WIFI $FLEET_VAR_SCEP_RENEWAL_ID</string>
                          </array>
                        </array>
                        <array>
                          <array>
                            <string>OU</string>
                            <string>FLEET DEVICE MANAGEMENT</string>
                          </array>
                        </array>
                    </array>
             <key>URL</key>
             <string>$FLEET_VAR_CUSTOM_SCEP_PROXY_URL_{CA_NAME}</string>
          </dict>
          <key>PayloadDisplayName</key>
          <string>WIFI SCEP</string>
          <key>PayloadIdentifier</key>
          <string>com.apple.security.scep.9DCC35A5-72F9-42B7-9A98-7AD9A9CCA3AC</string>
          <key>PayloadType</key>
          <string>com.apple.security.scep</string>
          <key>PayloadUUID</key>
          <string>9DCC35A5-72F9-42B7-9A98-7AD9A9CCA3AC</string>
          <key>PayloadVersion</key>
          <integer>1</integer>
       </dict>
    </array>
    <key>PayloadDisplayName</key>
    <string>SCEP proxy cert</string>
    <key>PayloadIdentifier</key>
    <string>Fleet.WiFi</string>
    <key>PayloadType</key>
    <string>Configuration</string>
    <key>PayloadUUID</key>
    <string>4CD1BD65-1D2C-4E9E-9E18-9BCD400CDEDC</string>
    <key>PayloadVersion</key>
    <integer>1</integer>
</dict>
</plist>
Windows configuration profile
All options in the example profile are required. To get the [CAThumbprint of your SCEP server] follow these steps.
You can add any other options listed under Device/SCEP in the Microsoft documentation.
<Replace>
    <Item>
        <Target>
            <LocURI>./Device/Vendor/MSFT/ClientCertificateInstall/SCEP/$FLEET_VAR_SCEP_WINDOWS_CERTIFICATE_ID</LocURI>
        </Target>
        <Meta>
            <Format xmlns="syncml:metinf">node</Format>
        </Meta>
    </Item>
</Replace>
<Replace>
    <Item>
        <Target>
            <LocURI>./Device/Vendor/MSFT/ClientCertificateInstall/SCEP/$FLEET_VAR_SCEP_WINDOWS_CERTIFICATE_ID/Install/KeyUsage</LocURI>
        </Target>
        <Meta>
            <Format xmlns="syncml:metinf">int</Format>
        </Meta>
        <Data>160</Data>
    </Item>
</Replace>
<Replace>
    <Item>
        <Target>
            <LocURI>./Device/Vendor/MSFT/ClientCertificateInstall/SCEP/$FLEET_VAR_SCEP_WINDOWS_CERTIFICATE_ID/Install/KeyLength</LocURI>
        </Target>
        <Meta>
            <Format xmlns="syncml:metinf">int</Format>
        </Meta>
        <Data>1024</Data>
    </Item>
</Replace>
<Replace>
    <Item>
        <Target>
            <LocURI>./Device/Vendor/MSFT/ClientCertificateInstall/SCEP/$FLEET_VAR_SCEP_WINDOWS_CERTIFICATE_ID/Install/HashAlgorithm</LocURI>
        </Target>
        <Meta>
            <Format xmlns="syncml:metinf">chr</Format>
        </Meta>
        <Data>SHA-1</Data>
    </Item>
</Replace>
<Replace>
    <Item>
        <Target>
            <LocURI>./Device/Vendor/MSFT/ClientCertificateInstall/SCEP/$FLEET_VAR_SCEP_WINDOWS_CERTIFICATE_ID/Install/SubjectName</LocURI>
        </Target>
        <Meta>
            <Format xmlns="syncml:metinf">chr</Format>
        </Meta>
        <Data>CN=$FLEET_VAR_HOST_HARDWARE_SERIAL WIFI,OU=$FLEET_VAR_SCEP_RENEWAL_ID</Data>
    </Item>
</Replace>
<Replace>
    <Item>
        <Target>
            <LocURI>./Device/Vendor/MSFT/ClientCertificateInstall/SCEP/$FLEET_VAR_SCEP_WINDOWS_CERTIFICATE_ID/Install/EKUMapping</LocURI>
        </Target>
        <Meta>
            <Format xmlns="syncml:metinf">chr</Format>
        </Meta>
        <Data>1.3.6.1.5.5.7.3.2</Data>
    </Item>
</Replace>
<Replace>
    <Item>
        <Target>
            <LocURI>./Device/Vendor/MSFT/ClientCertificateInstall/SCEP/$FLEET_VAR_SCEP_WINDOWS_CERTIFICATE_ID/Install/ServerURL</LocURI>
        </Target>
        <Meta>
            <Format xmlns="syncml:metinf">chr</Format>
        </Meta>
        <Data>$FLEET_VAR_CUSTOM_SCEP_PROXY_URL_{CA_NAME}</Data>
    </Item>
</Replace>
<Replace>
    <Item>
        <Target>
            <LocURI>./Device/Vendor/MSFT/ClientCertificateInstall/SCEP/$FLEET_VAR_SCEP_WINDOWS_CERTIFICATE_ID/Install/Challenge</LocURI>
        </Target>
        <Meta>
            <Format xmlns="syncml:metinf">chr</Format>
        </Meta>
        <Data>$FLEET_VAR_CUSTOM_SCEP_CHALLENGE_{CA_NAME}</Data>
    </Item>
</Replace>
<Replace>
    <Item>
        <Target>
            <LocURI>./Device/Vendor/MSFT/ClientCertificateInstall/SCEP/$FLEET_VAR_SCEP_WINDOWS_CERTIFICATE_ID/Install/CAThumbprint</LocURI>
        </Target>
        <Meta>
            <Format xmlns="syncml:metinf">chr</Format>
        </Meta>
        <Data><CA_THUMBPRINT></Data>
    </Item>
</Replace>
<Exec>
    <Item>
        <Target>
            <LocURI>./Device/Vendor/MSFT/ClientCertificateInstall/SCEP/$FLEET_VAR_SCEP_WINDOWS_CERTIFICATE_ID/Install/Enroll</LocURI>
        </Target>
    </Item>
</Exec>
Custom EST (Enrollment over Secure Transport)
The following steps show how to connect end users to Wi-Fi or VPN with a custom EST server.
The flow for EST is similar to Hydrant, and differs from the other certificate authorities. While other CAs in Fleet use a configuration profile to request a certificate, EST uses:
- A custom script that makes a request to Fleet's
POST /request_certificateAPI endpoint. - A custom policy that triggers the script on hosts that don't have a certificate.
Step 1: Obtain API credentials
This step will vary depending between providers. EST servers require a username and password for authentication. These may be obtained from your company's certificate authority administrator.
Step 2: Connect Fleet to the custom EST server
- In Fleet, head to Settings > Integrations > Certificates.
- Select Add CA and then choose Custom EST Proxy in the dropdown.
- Add a Name for your certificate authority. The best practice is to create a name based on your use case in all caps snake case (ex. "WIFI_AUTHENTICATION").
- Add your Custom EST Proxy URL.
- Add the username and password as the Username and Password in Fleet respectfully.
- Click Add CA. Your Custom EST Proxy certificate authority (CA) should appear in the list in Fleet.
Step 3: Create a custom script
To deploy certificates automatically to Linux hosts at enrollment, create a script that writes the certificate to the filesystem. Use a policy to trigger this script on any host that doesn’t have a certificate.
The script will create a certificate signing request (CSR) and make a request to Fleet's "Request certificate" API endpoint.
- Create an API-only user with the global maintainer role. Learn how to create an API-only user in the API-only user guide.
- In Fleet, head to Controls > Variables and create a Fleet variable called REQUEST_CERTIFICATE_API_TOKEN. Add the API-only user's API token as the value. You'll use this variable in your script. Optionally, you can use HTTP signatures instead of an API token. Learn more.
- Make a request to Fleet's
GET /certificate_authoritiesAPI endpoint to get theidfor your EST CA. You'll use thisidin your script. - In Fleet, head to Controls > Scripts, and add a script like the one below, plugging in your own filesystem locations, Fleet server URL and IdP information. For this script to work, the host it's run on has to have openssl, sed, curl and jq installed.
Example script:
#!/bin/bash
set -e

# Load the end user information, IdP token and IdP client ID.
. /opt/company/userinfo

URL="<IdP-introspection-URL>"

# Generate the password-protected private key
openssl genpkey -algorithm RSA -out /opt/company/CustomerUserNetworkAccess.key -pkeyopt rsa_keygen_bits:2048 -aes256 -pass pass:${PASSWORD}

# Generate CSR signed with that private key. The CN can be changed and DNS attribute omitted if your EST configuration allows it.
openssl req -new -sha256 -key /opt/company/CustomerUserNetworkAccess.key -out CustomerUserNetworkAccess.csr -subj /CN=CustomerUserNetworkAccess:${USERNAME} -addext "subjectAltName=DNS:example.com, email:$USERNAME, otherName:msUPN;UTF8:$USERNAME" -passin pass:${PASSWORD}

# Escape CSR for request
CSR=$(sed 's/$/\\n/' CustomerUserNetworkAccess.csr | tr -d '\n')
REQUEST='{ "csr": "'"${CSR}"'", "idp_oauth_url":"'"${URL}"'", "idp_token": "'"${TOKEN}"'", "idp_client_id": "'"${CLIENT_ID}"'" }'

curl 'https://<Fleet-server-URL>/api/latest/fleet/certificate_authorities/<EST-CA-ID>/request_certificate' \
  -X 'POST' \
  -H 'accept: application/json, text/plain, */*' \
  -H 'authorization: Bearer '"$FLEET_SECRET_REQUEST_CERTIFICATE_API_TOKEN" \
  -H 'content-type: application/json' \
  --data-raw "${REQUEST}" -o response.json

jq -r .certificate response.json > /opt/company/certificate.pem
This script assumes that your company installs a custom Company Portal app or something similar at /opt/company, gathers the user's IdP session information, uses username and a password to protect the private key from /opt/company/userinfo, and installs that the certificate in /opt/company. You will want to modify it to match your company's requirements.
For simplicity, the scripts use a userinfo file (below). However, the best practice is to load variables from the output of a command or even a separate network request:
PASSWORD="<Password-for-the-certificate-private-key>"
USERNAME="<End-user-email>"
TOKEN="<End-user-OAuth-IdP-token>"
CLIENT_ID="<OAuth-IdP-client-ID>"
Enforcing IdP validation using idp_oauth_url and idp_token is optional. If enforced, the CSR must include exactly 1 email which matches the IdP username and must include a UPN attribute which is either a prefix of the IdP username or the username itself (i.e., if the IdP username is "bob@example.com", the UPN may be "bob" or "bob@example.com").
Step 4: Create a custom policy
- In Fleet, head to Policies and select Add policy. Use the following query to detect the certificate's existence and if it expires in the next 30 days:
SELECT 1 FROM certificates WHERE path = '/opt/company/certificate.pem' AND not_valid_after > (CAST(strftime('%s', 'now') AS INTEGER) + 2592000);- Select Save and select only Linux as its target. Select Save again to create your policy.
- On the Policies page, select Manage automations > Scripts. Select your newly-created policy and then in the dropdown to the right, select your newly created certificate issuance script.
- Now, any host that doesn't have a certificate in
/opt/company/certificate.pemor has a certificate that expires in the next 30 days will fail the policy. When the policy fails, Fleet will run the script to deploy a new certificate!
Renewal
Fleet will automatically renew certificates on Apple (macOS, iOS, iPadOS), Windows, and Android hosts 30 days before expiration. If the entire validity period is less than 30 days (e.g. 20 days), Fleet will automatically renew at half the validity period (e.g. 10 days). Currently, Fleet does not support automatic renewal for Linux hosts.
Automatic renewal is only supported if the validity period is set to 2 days or longer.
If an end user is on vacation (offline for more than 30 days), their certificate might expire, and they'll lose access to Wi-Fi or VPN. To reconnect them, ask your end users to temporarily connect to a different network so that Fleet can deliver a new certificate.
Fleet automatically retries each failed macOS, iOS, iPadOS, and Windows certificate once per host, checking every 30 seconds for certificates to resend. Learn more in the 4.38.0 release article. Automatic retries for Android is coming soon.
Currently, for NDES, Smallstep, and custom SCEP CAs, Fleet requires that the
$FLEET_VAR_SCEP_RENEWAL_IDvariable is in the certificate's OU (Organizational Unit) for automatic renewal to work. For some CAs, including NDES, the OU has a maximum length of 64 characters so any characters beyond this limit get truncated, causing the renewal to fail.The
$FLEET_VAR_SCEP_RENEWAL_IDis a 36 character UUID. Please make sure that any additional variables or content combined with it do not exceed the remaining 28 characters.If automatic renewal fails, you can resend the configuration profile manually on the host's Host details page, the end user's Fleet Desktop > My Device page, or via Fleet's API.
Advanced
User-scoped certificates
You can deploy a user-scoped certificate on macOS and Windows hosts using a user-scoped configuration profile.
- Follow the instructions above to connect Fleet to your certificate authority (CA).
- Create a certificate configuration profile. For Windows, replace
./Devicewith./Userin all<LocURI>elements. For macOS, setPayloadScopetoUser. - In Fleet, navigate to Controls > OS settings > Custom settings and upload the configuration profile you created.
Editing ceritificate configuration profiles on Apple (macOS, iOS, iPadOS) hosts
When you edit a certificate configuration profile for Apple hosts, via GitOps, a new certificate will be added to each hosts' Keychain and the old certificate will be removed. It takes a couple minutes for the old certificate to be removed.
HTTP signatures
If you're deploying certificates from a custom EST certificate authority, you can use HTTP signatures instead of a Fleet API token to authenticate request to Fleet's "Request certificate" endpoint.
This is only supported on Linux hosts with TPM (Trusted Platform Module) hardware that enroll to Fleet using a Fleet agent generated (fleetctl package) with the --fleet-managed-host-identity-certificate flag.
This method also requires a means of signing the HTTP request using the TPM key. Fleet has provided a reference implementation written in Go in the Fleet repository under /orbit/cmd/fetch_cert/.
This example script assumes the reference implementation has been distributed to the machine requesting the certificate:
#!/bin/bash
set -e

# Load the end user information, IdP token and IdP client ID.
. /opt/company/userinfo

URL="<IdP-introspection-URL>"

# Generate the password-protected private key
openssl genpkey -algorithm RSA -out /opt/company/CustomerUserNetworkAccess.key -pkeyopt rsa_keygen_bits:2048 -aes256 -pass pass:${PASSWORD}

# Generate CSR signed with that private key. The CN can be changed and DNS attribute omitted if your EST configuration allows it.
openssl req -new -sha256 -key /opt/company/CustomerUserNetworkAccess.key -out CustomerUserNetworkAccess.csr -subj /CN=CustomerUserNetworkAccess:${USERNAME} -addext "subjectAltName=DNS:example.com, email:$USERNAME, otherName:msUPN;UTF8:$USERNAME" -passin pass:${PASSWORD}

fetch_cert -ca <EST-CA-ID> -fleeturl "<Fleet-server-URL>" -csr CustomerUserNetworkAccess.csr -out /opt/company/certificate.pem
Assumptions and limitations
- NDES SCEP proxy is currently supported for macOS devices via Apple config profiles. Support for DDM (Declarative Device Management) is coming soon, as is support for iOS, iPadOS, Windows, and Linux.
- Fleet server assumes a one-time challenge password expiration time of 60 minutes.
- On Windows, SCEP challenge strings should NOT include
base64encoding or special characters such as! @ # $ % ^ & * _, and Common Names (CN) should NOT include+characters. - The SCEP Server used for Windows, should accept
/pkiclient.exeat the end, as Windows will always append this to the SCEP URL. If using a Certificate Authority and Fleet Variables, Fleet handles this and strips it away from the request sent to the backing SCEP server. - On Windows hosts, Fleet will not verify the SCEP profile via osquery reports. Fleet will mark it as verified, if a successful request went through, even if the certificate is not present.
- On Windows hosts, Fleet will not remove certificates from profiles, when removing the profile from the host, or transferring teams.
How the SCEP proxy works
Fleet acts as a middleman between the host and the NDES or custom SCEP server. When a host requests a certificate from Fleet, Fleet requests a certificate from the NDES or custom SCEP server, retrieves the certificate, and sends it back to the host.
Certificates will appear in the System Keychain on macOS. During the profile installation, the OS generates several temporary certificates needed for the SCEP protocol. These certificates may be briefly visible in the Keychain Access app on macOS. The CA certificate must also be installed and marked as trusted on the device for the issued certificate to appear as trusted. The IT admin can send the CA certificate in a separate CertificateRoot profile
In addition, Fleet does the following:
NDES SCEP proxy:
- Retrieves the one-time challenge password from NDES. The NDES admin password is encrypted in Fleet's database by the server private key. It cannot be retrieved via the API or the web interface. Retrieving passwords for many hosts at once may cause a bottleneck. To avoid long wait times, we recommend a gradual rollout of SCEP profiles.
- Restarting NDES will clear the password cache and may cause outstanding SCEP profiles to fail.
- Resends the configuration profile to the host if the one-time challenge password has expired.
- If the host has been offline and the one-time challenge password is more than 60 minutes old, Fleet assumes the password has expired and will resend the profile to the host with a new one-time challenge password.
Custom SCEP proxy:
- Generates a one-time passcode that is added to the URL in the SCEP profile.
- When a host makes a certificate request via the URL, the passcode is validated by Fleet prior to retrieving a certificate from the custom SCEP server.
- This Fleet-managed passcode is valid for 60 minutes. Fleet automatically resends the SCEP profile to the host with a new passcode if the host requests a certificate after the passcode has expired.
- The static challenge configured for the custom SCEP server remains in the SCEP profile.
How to get the CAThumbprint for Windows SCEP profiles
An example CAThumprint looks like this: 2133EC6A3CFB8418837BB395188D1A62CA2B96A6
Steps to get CAThumbrint from your SCEP server:
- In your browser, open the following URL to download a certificate: https://
/scep?operation=GetCACert - Run the following command to get the SHA1 Thumbprint:
- Terminal (macOS) ->
openssl x509 -inform DER -in /path/to/downloaded-cert.cer -noout -fingerprint -sha1 | sed 's/sha1 Fingerprint=//; s/://g - PowerShell (Windows) ->
$cert = Get-PfxCertificate -FilePath "Z:\scep (1).cer";$cert.Thumbprint
- Terminal (macOS) ->
- It will return the SHA1 Thumbprint without colons and text. Copy this.
- Use the copied value for
./Device/Vendor/MSFT/ClientCertificateInstall/SCEP/$FLEET_VAR_SCEP_WINDOWS_CERTIFICATE_ID/Install/CAThumbprintoption.