Solutions
Device management
Remotely manage, and protect laptops and mobile devices.
Orchestration
Automate tasks across devices, from app installs to scripts.
Software management
Inventory, patch, and manage installed software.
Infrastructure as code
See every change, undo any error, repeat every success.
Extend Fleet
Integrate your favorite tools with Fleet.
Customers
Pricing
More
Device management
Remotely manage, and protect laptops and mobile devices.
Orchestration
Automate tasks across devices, from app installs to scripts.
Software management
Inventory, patch, and manage installed software.
Infrastructure as code
See every change, undo any error, repeat every success.
Extend Fleet
Integrate your favorite tools with Fleet.
macOS MDM migration
{{articleSubtitle}}
Mo Zhu
macOS MDM migration
{{articleSubtitle}}
Mo Zhu
macOS MDM migration
This guide provides instructions for migrating devices from your current MDM solution to Fleet. There are two different workflows to migrate your devices.
For seamless MDM migration, view this guide.
Requirements
- A deployed Fleet instance
- Fleet is connected to Apple Push Notification service (APNs) and Apple Business Manager (ABM). See macOS MDM setup
- For the end-user workflow: A service is required that can receive a webhook to send an unenroll request to the existing MDM server. See this example using Fleet webhooks with Tines.
Important: Apple MDM enrollment relies on a Safari-based system web view. If Safari is blocked or restricted, enrollment can fail.
Migrate hosts
To migrate hosts, we will do the following steps:
- Enroll hosts to Fleet
- Assign hosts in Apple Business Manager (ABM) to Fleet
- Choose migration workflow and migrate hosts
Step 1: Enroll hosts to Fleet
- First, enroll your hosts to Fleet by installing Fleet's agent (fleetd).
- Ensure your end users have access to an admin account on their Mac. End users won't be able to migrate on their own if they have a standard account.
Step 2: Assign hosts in Apple Business Manager (ABM) to Fleet
In ABM, unassign your hosts from your current MDM solution by selecting Devices and then selecting All Devices. Then, select Edit next to Edit MDM Server, select Unassign from the current MDM, and select Continue.
Assign these hosts to Fleet: select Devices and then select All Devices. Then, select Edit next to Edit MDM Server, select Assign to the following MDM:, select your Fleet server in the dropdown, and select Continue.
Step 3: Choose migration workflow and migrate hosts
There are two migration workflows in Fleet: default and end user.
The default migration workflow requires that the IT admin unenrolls hosts from the old MDM solution before the end user can complete migration. This will result in a gap in MDM coverage until the end user completes migration.
The end user migration workflow allows the user to kick off migration by unenrolling from the old MDM solution on their own. Once the user is unenrolled, they're prompted to turn on MDM features in Fleet, reducing the gap in MDM coverage.
Default workflow
End user experience:
- After a host is unenrolled from your current MDM solution, the end user is prompted with Apple’s Remote Management full-screen pop-up, typically within two hours, if the host is assigned to Fleet in ABM.
Note: After Fleet begins prompting end users to enroll, it will continue to prompt them every few minutes.
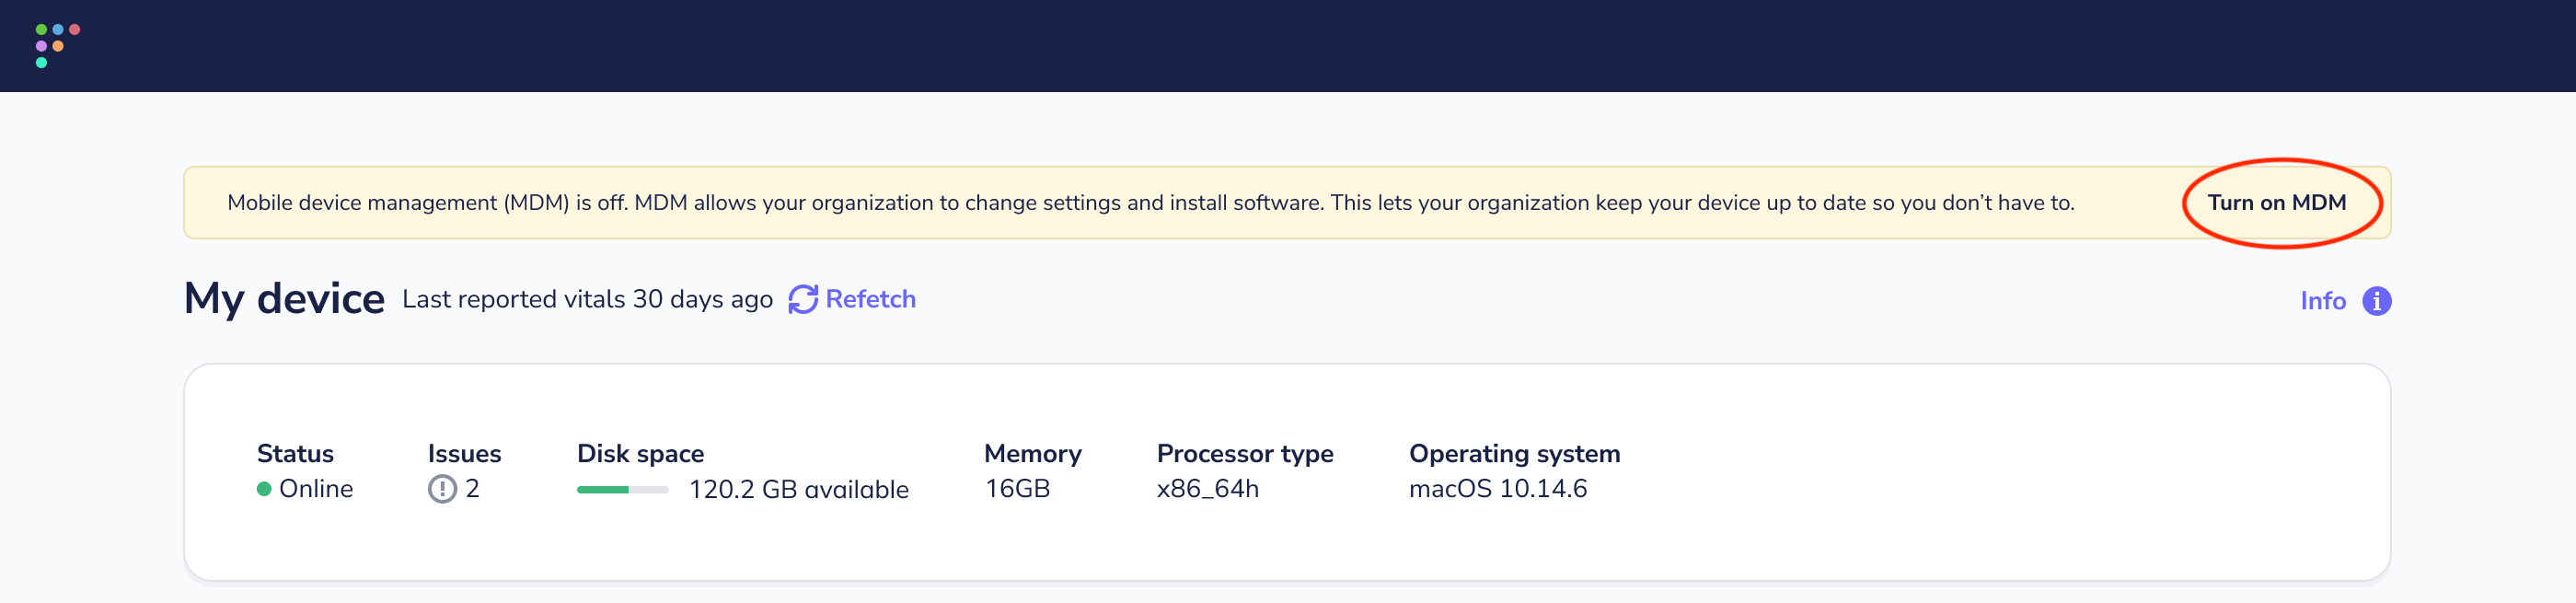
- If the host is not assigned to Fleet in ABM (manual enrollment), the end user will be given the option to download the MDM enrollment profile on their My device page.
Configuration:
- To kick off the default workflow, unenroll the hosts to be migrated in your current MDM solution. macOS does not allow a host to be connected to multiple MDM solutions at once.
End user workflow
Available in Fleet Premium
Fleet's agents must have updates enabled (default), for the end user migration workflow to work.
Fleet uses swiftDialog to instruct end users to enroll. swiftDialog is only installed on macOS hosts when the end user migration workflow starts. When the workflow is disabled, swiftDialog stays installed. swiftDialog is also installed for macOS setup experience.
End user experience:
- To watch an animation of the end user experience during the migration workflow, head to Settings > Integrations > MDM in the Fleet UI, and scroll down to the End user migration workflow section.
Note: After Fleet begins prompting end users to enroll, it will continue to prompt them every few minutes.
Configuration:
In Fleet, you can configure the end user workflow using the Fleet UI, Fleet API, or Fleet's GitOps workflow.
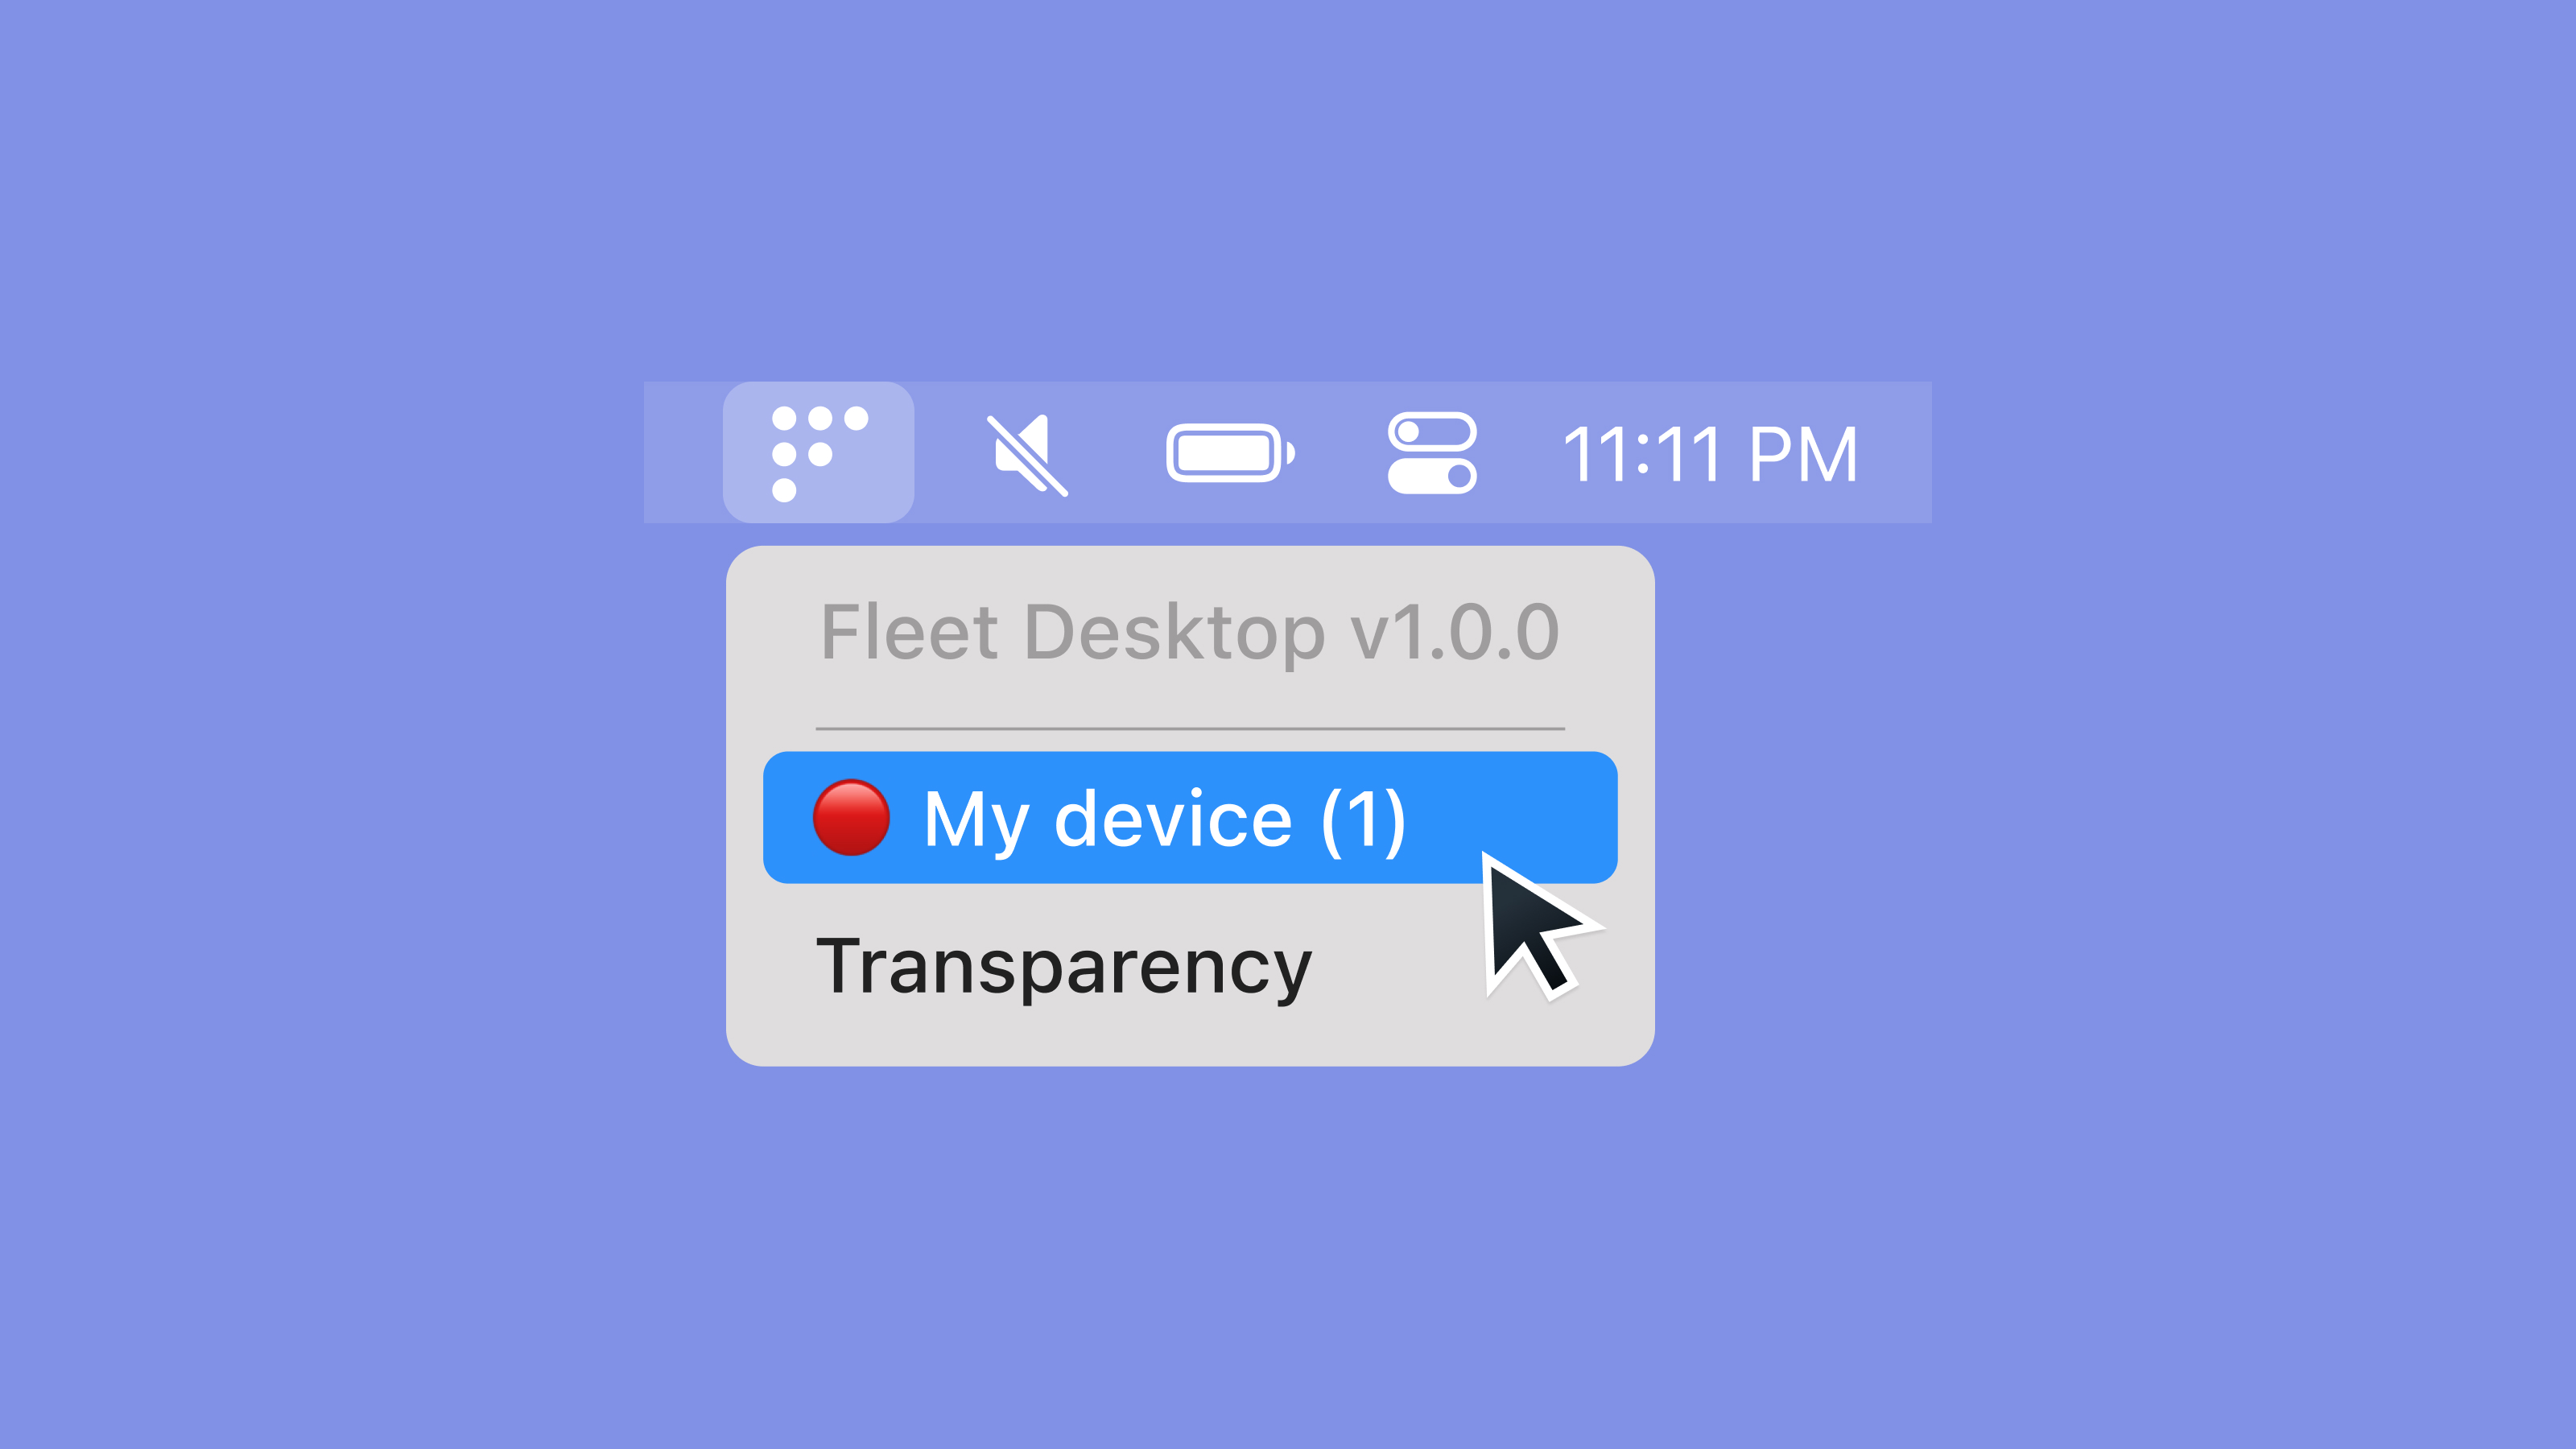
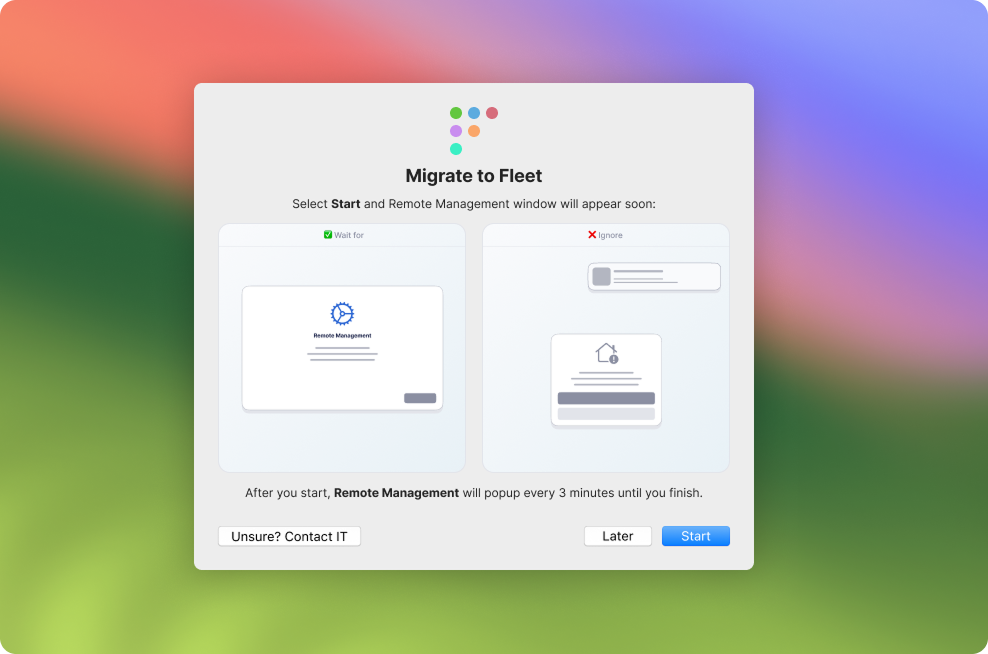
After configuring the end user workflow, instruct your end users to select the Fleet icon in their menu bar, select Migrate to Fleet and follow the on-screen instructions to migrate to Fleet.
Fleet UI:
- Select the avatar on the right side of the top navigation and select Settings > Integrations > MDM.
- Scroll down to the End user migration workflow section and select the toggle to enable the workflow.
- Under Mode, choose a mode, enter the webhook URL for your automation tool (e.g., Tines) under Webhook URL, and select Save.
- During the end user migration workflow, an end user's device will have its selected system theme (light or dark) applied. If your logo is not easy to see on both light and dark backgrounds, you can optionally set a logo for each theme: Head to Settings > Organization settings > Organization info, add URLs to your logos in the Organization avatar URL (for dark backgrounds) and Organization avatar URL (for light backgrounds) fields, and select Save. See configuration docs for recommended sizes for logos.
- During migration, end users will see a button that says "Unsure? Contact IT". Head to Settings > Organization settings > Organization info > Organization support URL to direct users to your help desk if they have any questions.
Fleet API: MDM migration settings are configured via the mdm.macos_migration field on the Modify configuration API endpoint.
GitOps:
- To manage macOS MDM migration configuration using Fleet's best practice GitOps, check out the
macos_migrationkey in the GitOps reference documentation. - To manage your organization's logo for dark and light backgrounds using Fleet's best practice GitOps, check out the
org_infokey in the GitOps reference documentation.
Check migration progress
To see a report of which hosts have successfully migrated to Fleet, have MDM features off, or are still enrolled to your old MDM solution head to the Dashboard page by clicking the icon on the left side of the top navigation bar.
Then, scroll down to the Mobile device management (MDM) section of the Dashboard. You'll see a breakdown of which hosts have successfully migrated to Fleet, which have MDM features disabled, and which are still enrolled in the previous MDM solution.
FileVault recovery keys
Available in Fleet Premium
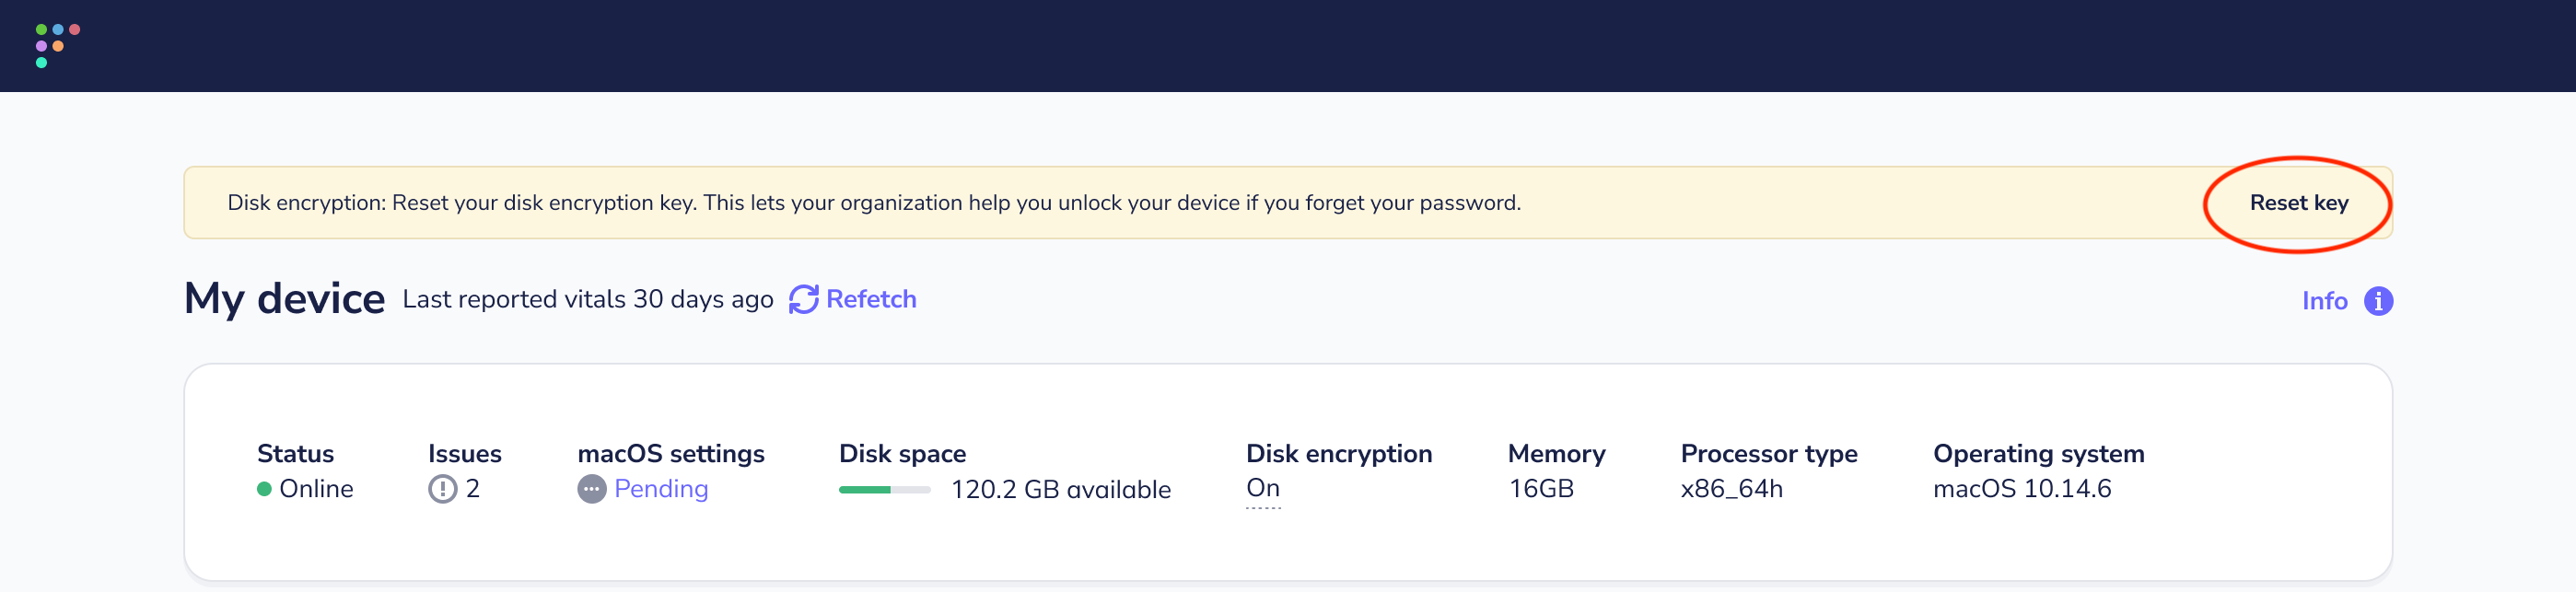
When migrating from a previous MDM, end users must restart or log out of their device to escrow FileVault keys to Fleet. The My device page in Fleet Desktop will present users with instructions on how to reset their key.
To start, enforce FileVault disk encryption in Fleet.
After turning on disk encryption in Fleet, share these guided instructions with your end users.
How to turn on disk encryption
- Select the Fleet icon in your menu bar and select My device.
- On your My device page, follow the disk encryption instructions in the yellow banner.
- If you don’t see the yellow banner, select the purple Refetch button at the top of the page.
- If you still don't see the yellow banner after a couple minutes or if the My device page presents you with an error, please contact your IT administrator.
Activation Lock
In Fleet, the Activation Lock feature is disabled by default for automatically enrolled (ADE) hosts.
In 2024, Apple added the ability to manage activation lock in Apple Business Manager (ABM). For devices that are owned by the business and available in ABM, you can turn off activation lock remotely.
If a device is not available in ABM and has Activation Lock enabled, we recommend asking the end user to follow these instructions to disable Activation Lock before migrating the device to Fleet: https://support.apple.com/en-us/HT208987.
If the Activation Lock is enabled, you will need the Activation Lock bypass code to wipe and reuse the Mac successfully.
However, Activation Lock bypass codes can only be retrieved from the Mac up to 30 days after the device is enrolled. This means that when migrating from your old MDM solution, it’s likely that you’ll be unable to retrieve the Activation Lock bypass code.